Nachdem ich den OSD Build Share erstellt habe, gehe ich die Deployment Workbench von oben nach unten durch. Zuerst werde ich Anwendungen zur Deployment Workbench hinzufügen. Vorbereitet habe ich die Software im Teil Standard Software vorbereiten und Die Installation von Microsoft Office anpassen.
Microsoft Office 2013 Pro Plus zur Deployment Workbench hinzufügen
- Als Administrator an MDT1 anmelden
- Deployment Workbench starten
- OSD Build Share erweitern
- Applications rechts anklicken > New Folder

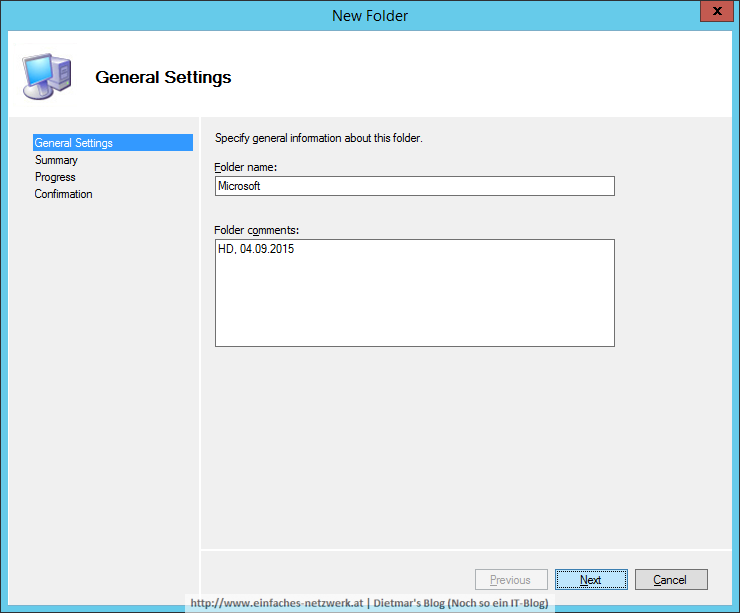
- New Folder
- General Settings
- Folder name: Microsoft
- Folder comments: HD, 04.09.2015 > Next
- Summary > Next
- Confirmation > Finish
- General Settings
- Den Ordner Microsoft rechts anklicken > New Application

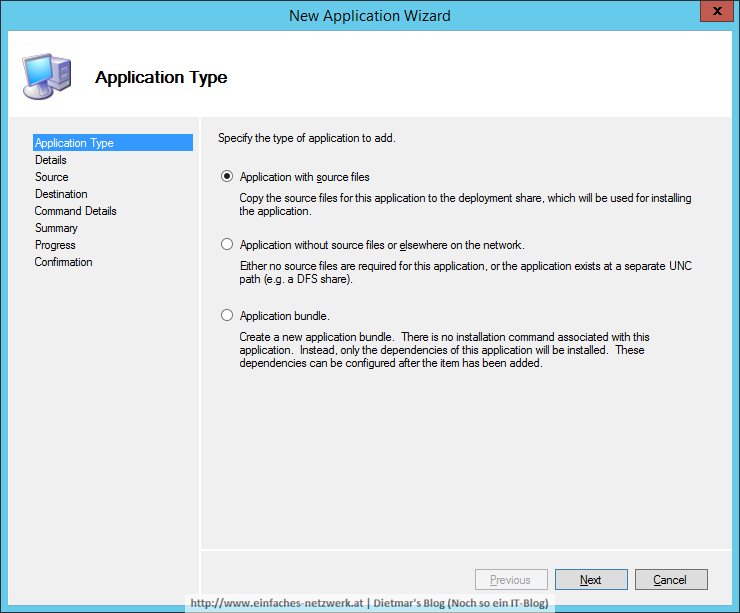
- New Application Wizard
- Applcation type: Application with source files > Next
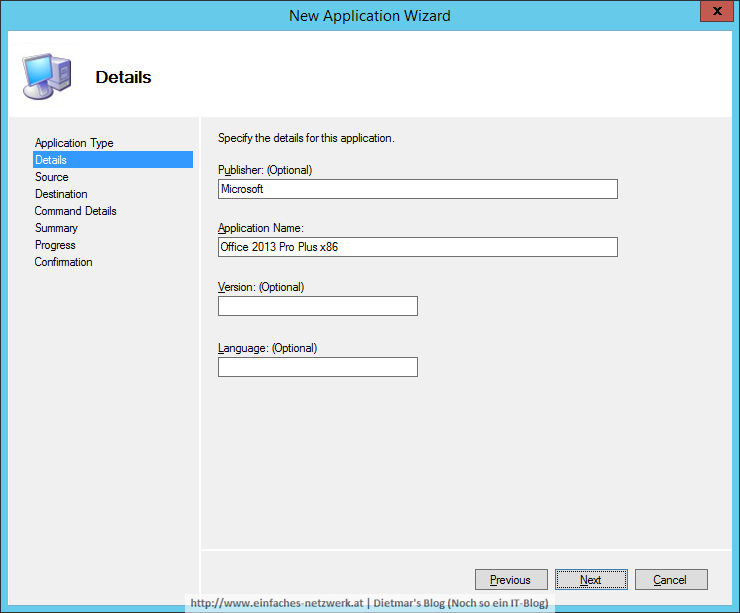
- Details
- Publisher: Microsoft
- Application name: Office 2013 Pro Plus x86 > Next
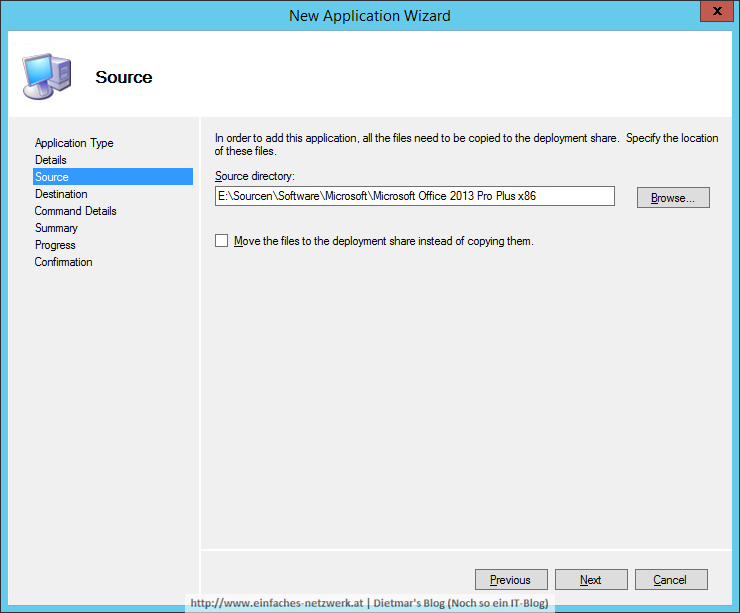
- Source
- Source directory: E:\Sourcen\Software\Microsoft\Microsoft Office 2013 Pro Plus x86 > Next
- Source directory: E:\Sourcen\Software\Microsoft\Microsoft Office 2013 Pro Plus x86 > Next
- Destination: Microsoft Office 2013 Pro Plus x86 > Next

- Command Details
- Command line: Setup.exe > Next
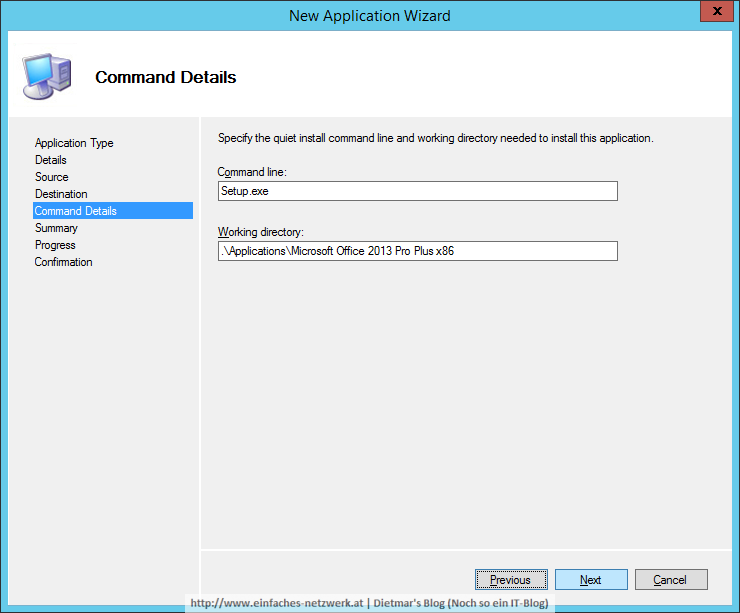
- Command line: Setup.exe > Next
- Summary > Next
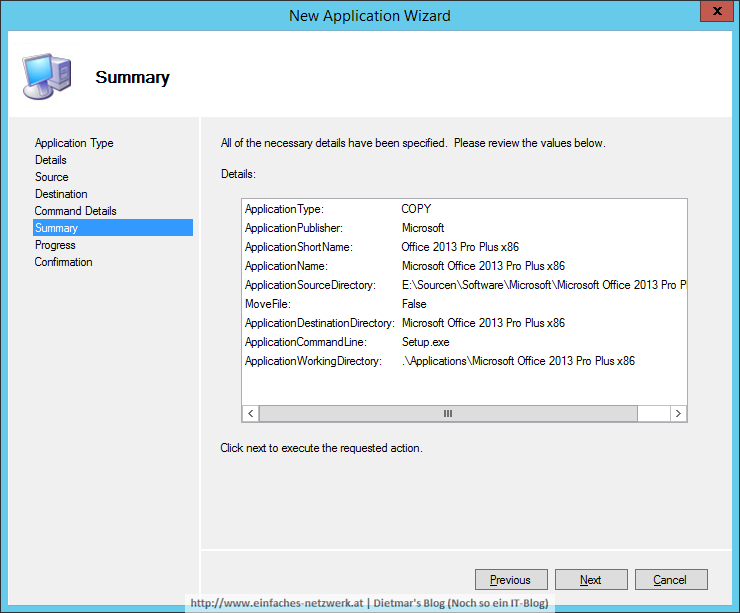
- Confirmation > Finish

- Applcation type: Application with source files > Next
Weitere Anwendungen zur Deployment Workbench hinzufügen
- Microsoft RSAT for Windows 10
- Applcation type: Application with source files
- Publisher: Microsoft
- Application name: RSAT for Windows 10 x64
- Source directory: E:\Sourcen\Software\Microsoft\Microsoft RSAT for Windows 10 x64
- Destination: Microsoft RSAT for Windows 10 x64
- Command line: install.exe
- Microsoft Silverlight 5.1 x64
- Applcation type: Application with source files
- Publisher: Microsoft
- Application name: Silverlight 5.1 x64
- Source directory: E:\Sourcen\Software\Microsoft\Microsoft Silverlight 5.1 x64
- Destination: Microsoft Silverlight 5.1 x64
- Command line: install.exe
- Microsoft Visual C++ 2005 SP1 x86 x64
- Applcation type: Application with source files
- Publisher: Microsoft
- Application name: Visual C++ 2005 SP1 x86 x64
- Source directory: E:\Sourcen\Software\Microsoft\Microsoft Visual C++ 2005 SP1 x86 x64
- Destination: Microsoft Visual C++ 2005 SP1 x86 x64
- Command line: install.exe
- Microsoft Visual C++ 2008 SP1 x86 x64
- Applcation type: Application with source files
- Publisher: Microsoft
- Application name: Visual C++ 2008 SP1 x86 x64
- Source directory: E:\Sourcen\Software\Microsoft\Microsoft Visual C++ 2008 SP1 x86 x64
- Destination: Microsoft Visual C++ 2008 SP1 x86 x64
- Command line: install.exe
- Microsoft Visual C++ 2010 SP1 x86 x64
- Applcation type: Application with source files
- Publisher: Microsoft
- Application name: Visual C++ 2010 SP1 x86 x64
- Source directory: E:\Sourcen\Software\Microsoft\Microsoft Visual C++ 2010 SP1 x86 x64
- Destination: Microsoft Visual C++ 2010 SP1 x86 x64
- Command line: install.exe
- Microsoft Visual C++ 2012 x86 x64
- Applcation type: Application with source files
- Publisher: Microsoft
- Application name: Visual C++ 2012 x86 x64
- Source directory: E:\Sourcen\Software\Microsoft\Microsoft Visual C++ 2012 x86 x64
- Destination: Microsoft Visual C++ 2012 x86 x64
- Command line: install.exe
- Microsoft Visual C++ 2013 x86 x64
- Applcation type: Application with source files
- Publisher: Microsoft
- Application name: Visual C++ 2013 x86 x64
- Source directory: E:\Sourcen\Software\Microsoft\Microsoft Visual C++ 2013 x86 x64
- Destination: Microsoft Visual C++ 2013 x86 x64
- Command line: install.exe
- Microsoft Visual C++ 2015 x86 x64
- Applcation type: Application with source files
- Publisher: Microsoft
- Application name: Visual C++ 2015 x86 x64
- Source directory: E:\Sourcen\Software\Microsoft\Microsoft Visual C++ 2015 x86 x64
- Destination: Microsoft Visual C++ 2015 x86 x64
- Command line: install.exe
- Applications in der Deplyoment Workbench
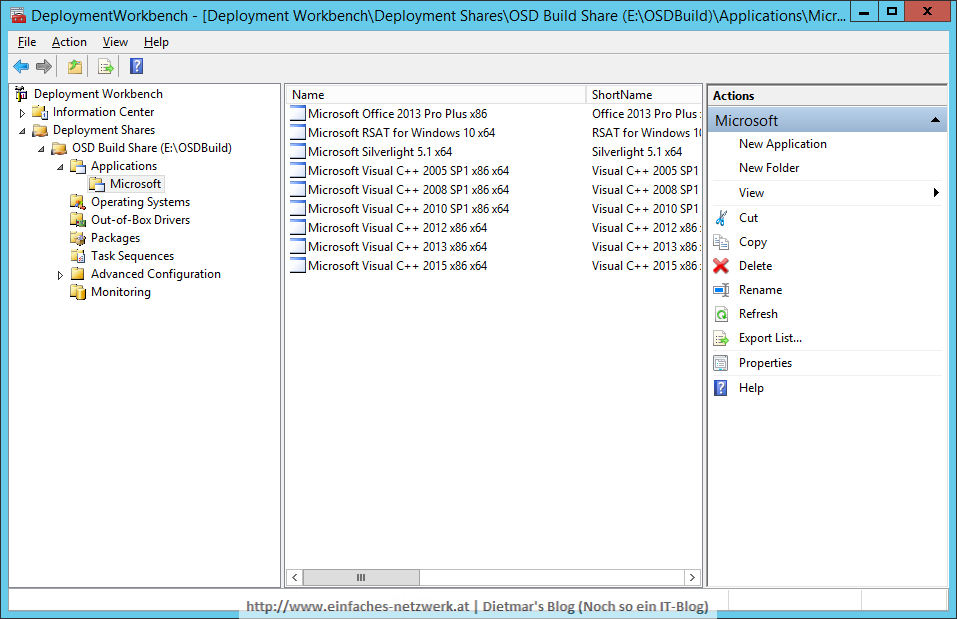
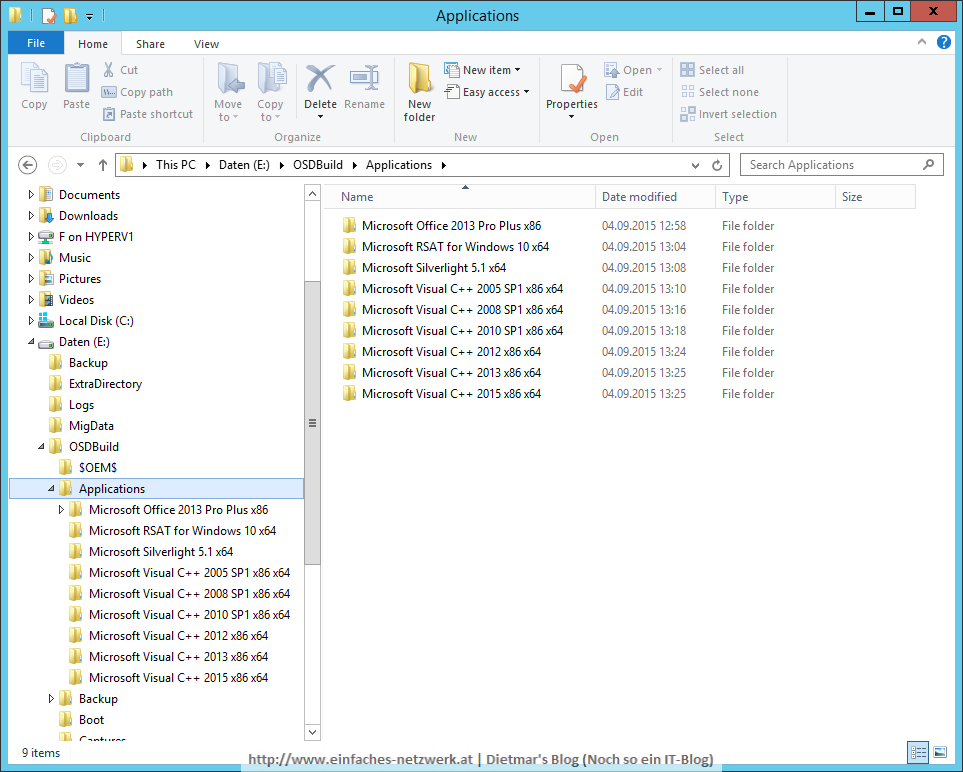
- Applications im Datei-Explorer
Ich habe eine (vielleicht etwas blöde) Frage: Müssen die Dateien, die in den OSDBuild Ordner importiert werden, im Sourcen Ordner bleiben oder können sie dort gelöscht werden? So wie ich das verstehe, entstehen ja Kopien im OSDBuild Ordner.
Die Dateien können gelöscht werden. Ich hebe mir den Sourcen-Ordner immer auf, falls doch mal was passiert. Aber ja, die Dateien können gelöscht werden. Ist nicht wie beim ConfigMgr.