Mitte Mai 2016 hat Microsoft das Windows 7 SP1 Convenience Rollup veröffentlicht. Dieses Rollup enthält alle Sicherheitsupdates und Updates bis April 2016. Ab diesem Zeitpunkt werden Updates in monatlichen Rollups, ähnlich wie bei Windows 10, verteilt (z.B.: Mai 2016 update Rollup für Windows 7 SP1 und Windows Server 2008 R2 SP1). Endlich eine gute Sache, wie ich finde. Im folgenden Artikel beschreibe ich die Installation mittels MDT. Voraussetzung sind die Kapitel 7-11 der Reihe „Ein einfaches Netzwerk“.
Vorbereitung
- Als Administrator an MDT01 anmelden
- Folgende Datei nach D:\Sourcen\Packages\Windows 7 x64 herunterladen
- Folgende Datei nach D:\Sourcen\Applications\Microsoft\Microsoft Windows 7 SP1 Convenience Rollup x64 herunterladen
- Folgendes AutoIt-Script erstellen und in D:\Sourcen\Applications\Microsoft\Microsoft Windows 7 SP1 Convenience Rollup x64 speichern und kompilieren
#cs ------------------------------------------------------------

 AutoIt Version: 3.3.14.1
 Author:         Dietmar's Blog | Noch so ein IT-Blog
 Script Function: Install Software.

#ce ------------------------------------------------------------

; Script Start - Add your code below here

Opt("TrayIconHide", 1)

RunWait("wusa.exe Windows6.1-KB3125574-v4-x64.msu /quiet /norestart")
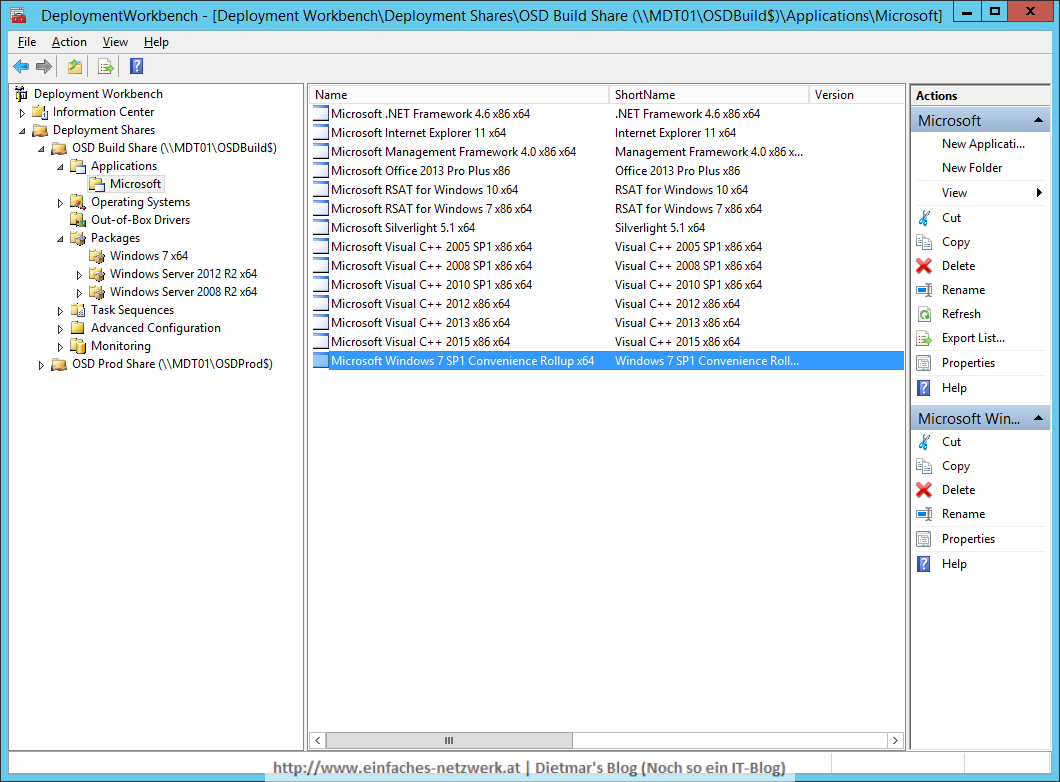
Windows 7 SP1 Convenience Rollup zur Deployment Workbench hinzufügen
Hinweis: Alle vorhanden Updates für Internet Explorer 11 usw. dürfen nicht entfernt werden!
- Deployment Workbench starten
- Applications\Microsoft rechts anklicken > New Application
- New Application Wizard
- Application Type
- Application with source files > Next
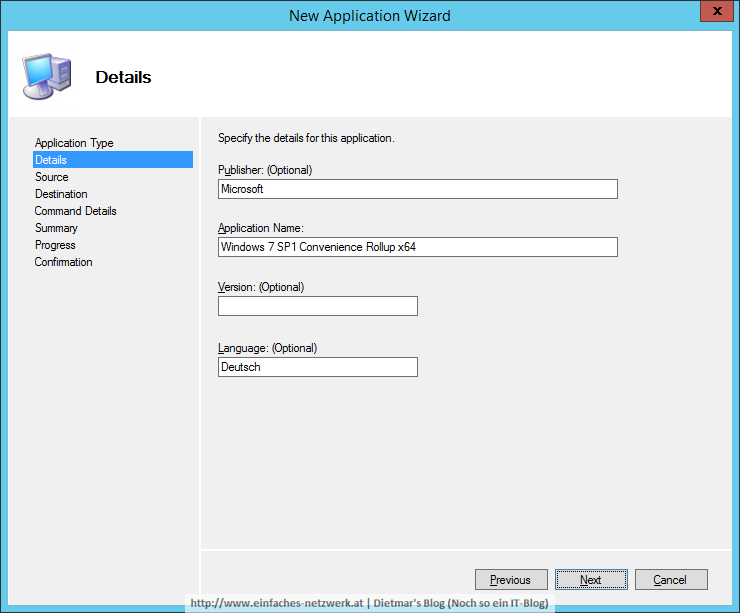
- Details
- Publisher: Microsoft
- Application name: Windows 7 SP1 Convenience Rollup x64
- Language: Deutsch > Next
- Source: D:\Sourcen\Applications\Microsoft\Microsoft Windows 7 SP1 Convenience Rollup x64 > Next
- Destination > Next
- Command Details
- Command line: install.exe > Next
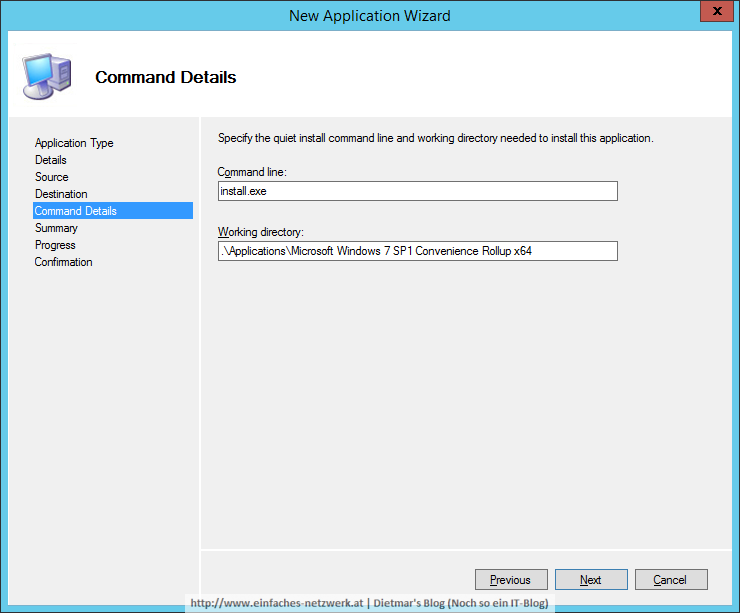
- Command line: install.exe > Next
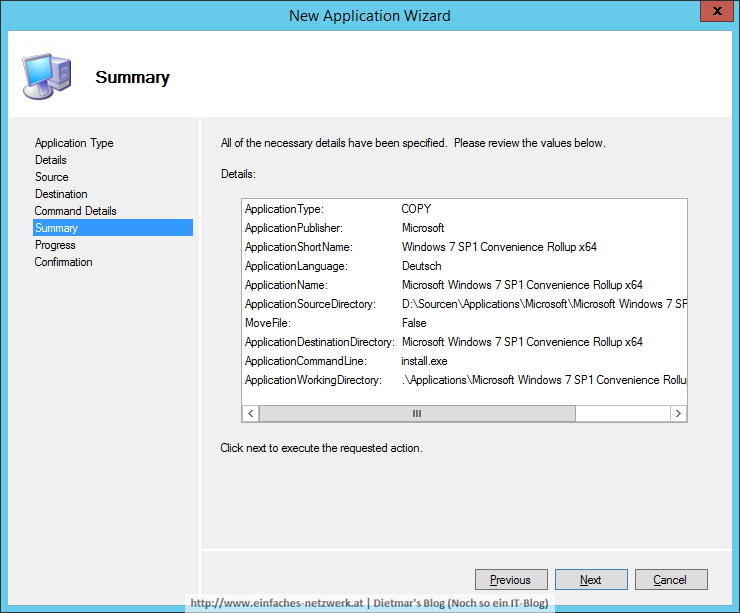
- Summary > Next
- Confirmation > Finish
- Application Type
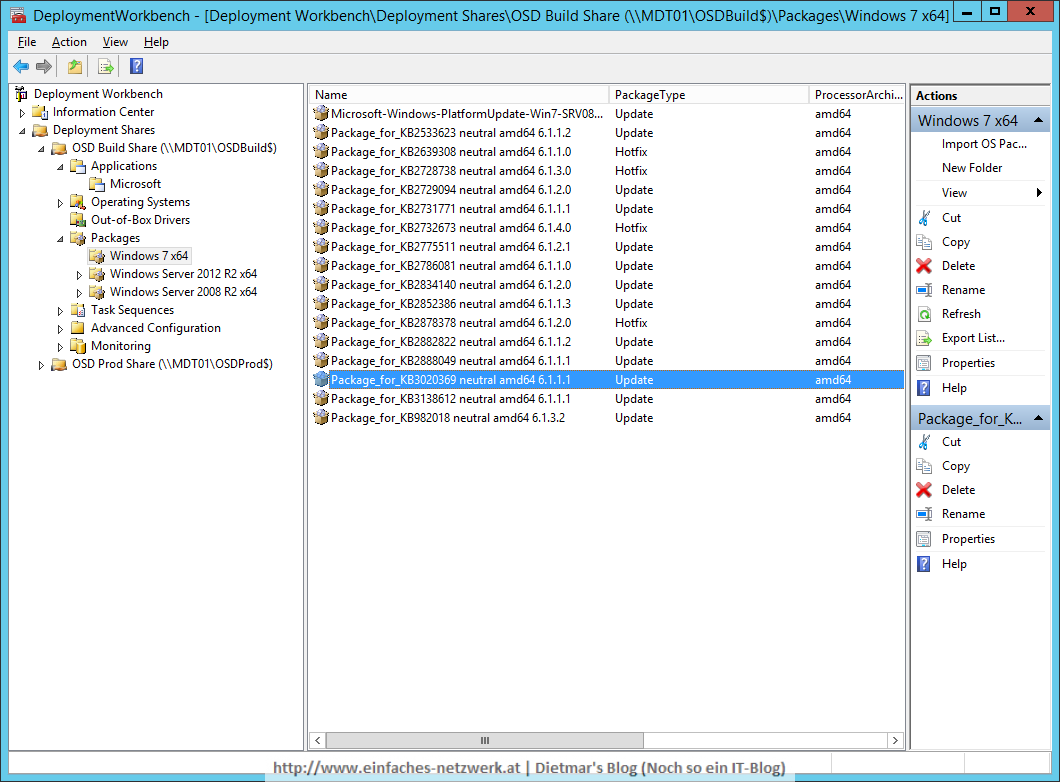
- Packages\Windows 7 x64 rechts anklicken > Import OS Packages
- Import Package Wizard
- Specify Directory
- Package source Directory: D:\Sourcen\Packages\Windows 7 x64 > Next
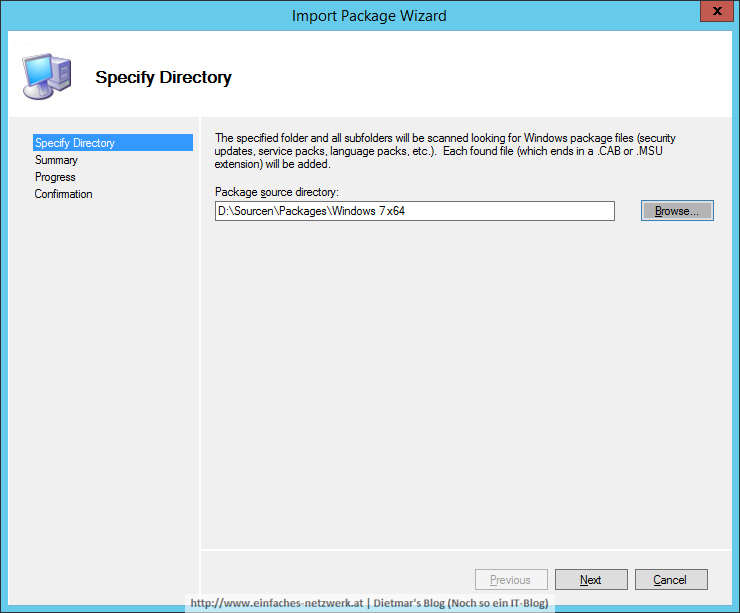
- Package source Directory: D:\Sourcen\Packages\Windows 7 x64 > Next
- Summary > Next
- Confirmation > Finish
- Specify Directory
- Advanced Configuration\Selection Profiles anklicken
- Folgendes Selection Profile muss vorhanden sein, bei Bedarf erstellen
- Windows 7 x64 Updates
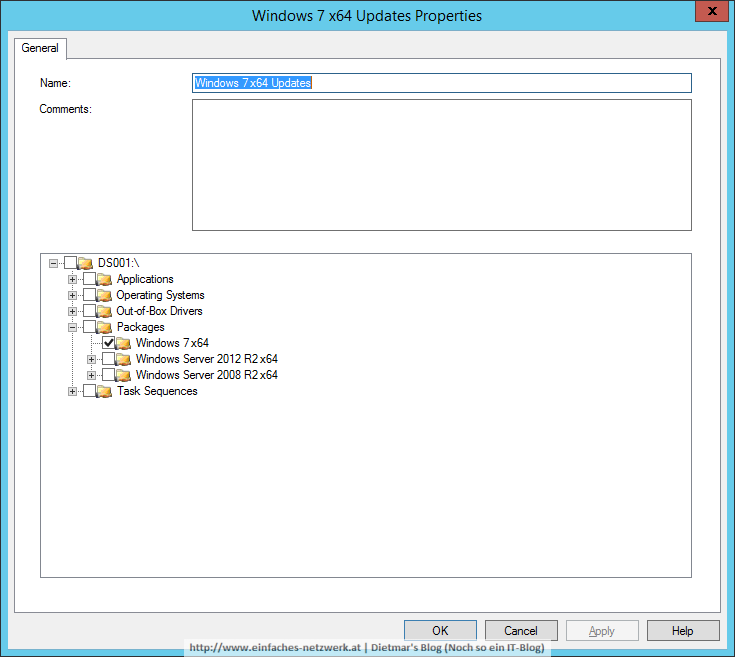
- Windows 7 x64 Updates
Task Sequence anpassen
- Die Task Sequence Build and capture Windows 7 Enterprise x64 zum Bearbeiten öffnen
- Den Schritt Preinstall\Apply Patches anklicken
- Sicherstellen, dass das Selection Profile Windows 7 x64 Updates ausgewählt ist

- Vor die Gruppe Standard Software die Gruppe Convenience Rollup erstellen
- Zur Gruppe Convenience Rollup folgende Schritte hinzufügen:
- Type: Install Application
- Name: INSTALL – Microsoft Windows 7 SP1 Convenience Rollup x64
- Install a single application: Microsoft Windows 7 SP1 Convenience Rollup x64
- Type: Restart Computer
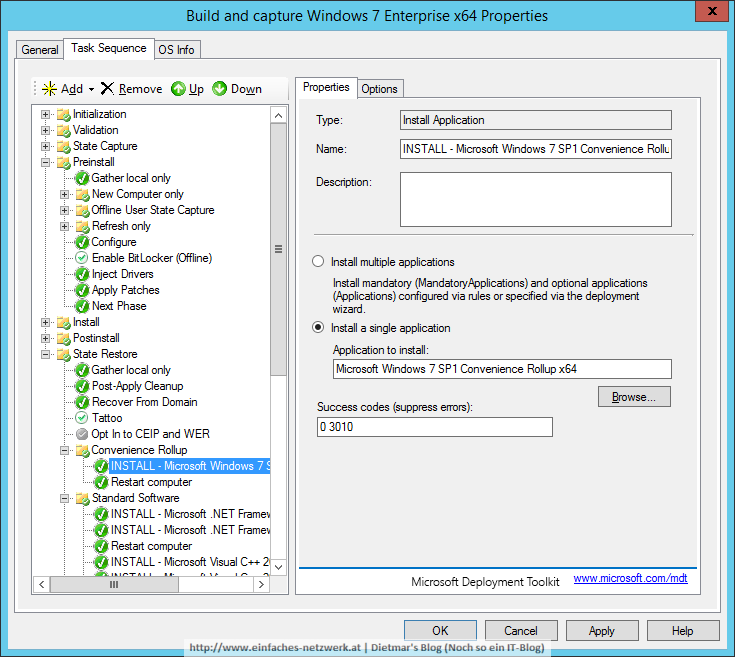
- Type: Install Application
- Fenster mit OK schließen
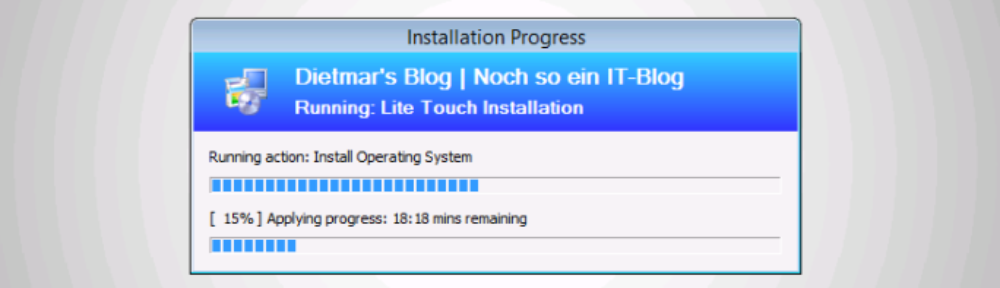
Windows 7 Enterprise x64-Image erstellen
- Hyper-V-Rechner (Generation 1) mit OSDBuildPE_x64.iso starten
- Task Sequence auswählen
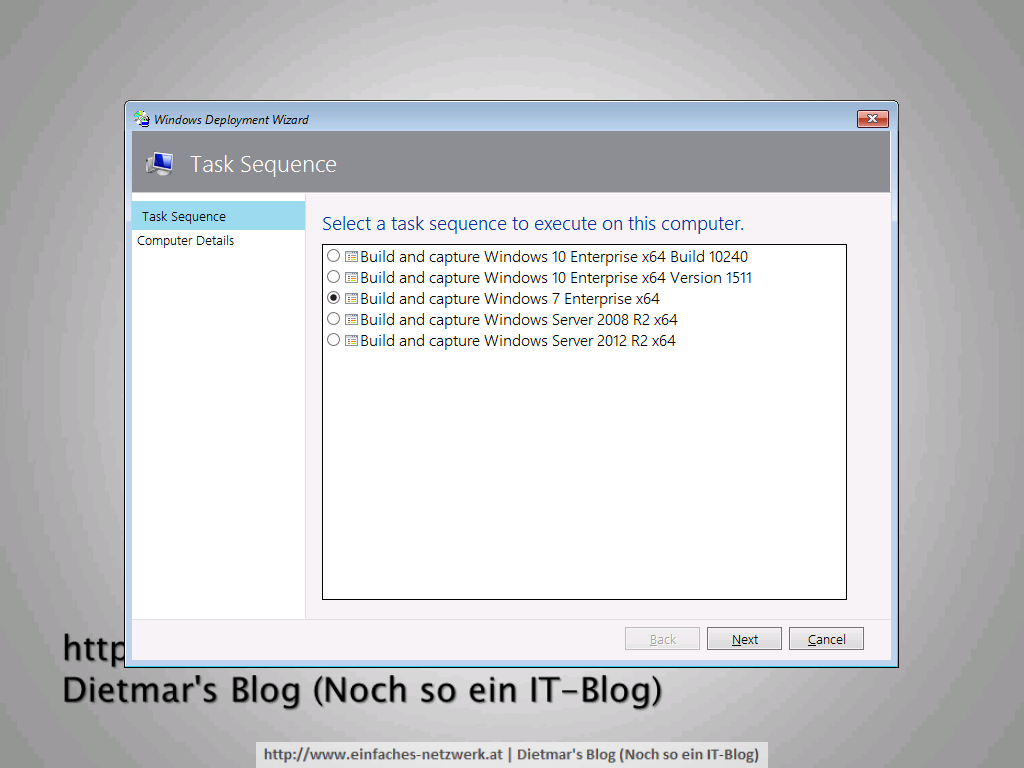
- Das Image wird erstellt
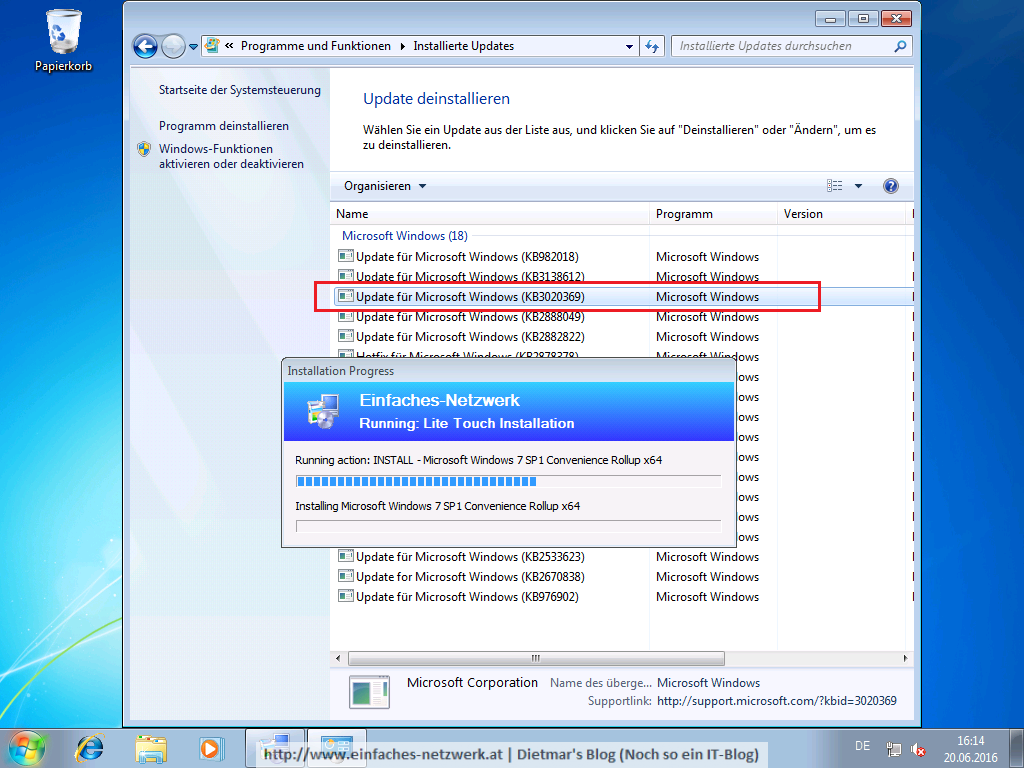
Nach der Installation des Images waren etwa 90 Windows-Updates installiert. Das ist doch eine große Anzahl weniger als vor dem Windows 7 SP1 Convenience Rollup.