In diesem Teil werde ich den Server WSUS1 für die Windows Server Update Services vorbereiten. Dazu gehört der Microsoft Report Viewer 2008 und Microsoft SQL Server 2012 SP2 Express mit Tools.
Inhaltsverzeichnis
Virtuellen Rechner erstellen – WSUS1
- Name: WSUS1
- Store the virtual machine in a different location aktivieren
- Generation 2
- Startup Memory: 1024 MB
- Maximum Menory: 4096 MB
- Use Dynamic Memory for this virtual machine aktivieren
- Network Connection: CorpNet
- Hard Disk: WSUS1_C.vhdx, 60GB
- Hard Disk: WSUS1_DATA.vhdx, 200GB
- Image file: C:\Sourcen\Windows_Server_Std_2012_R2_64bit.iso
Konfiguration von WSUS1
Den Rechner wie in Teil 1: Windows Server 2012 R2 installieren und konfigurieren und Teil 1a: .NET Framework 3.5 auf Windows Server 2012 R2 installieren installieren und konfigurieren
- Name: WSUS1
- Domain: intern.einfaches-netzwerk.at
- IP address: 192.168.150.4
- Subnet mask: 255.255.255.0
- Default gateway: 192.168.150.1
- Preferred DNS server: 192.168.150.1
- DNS suffix for this connection: intern.einfaches-netzwerk.at
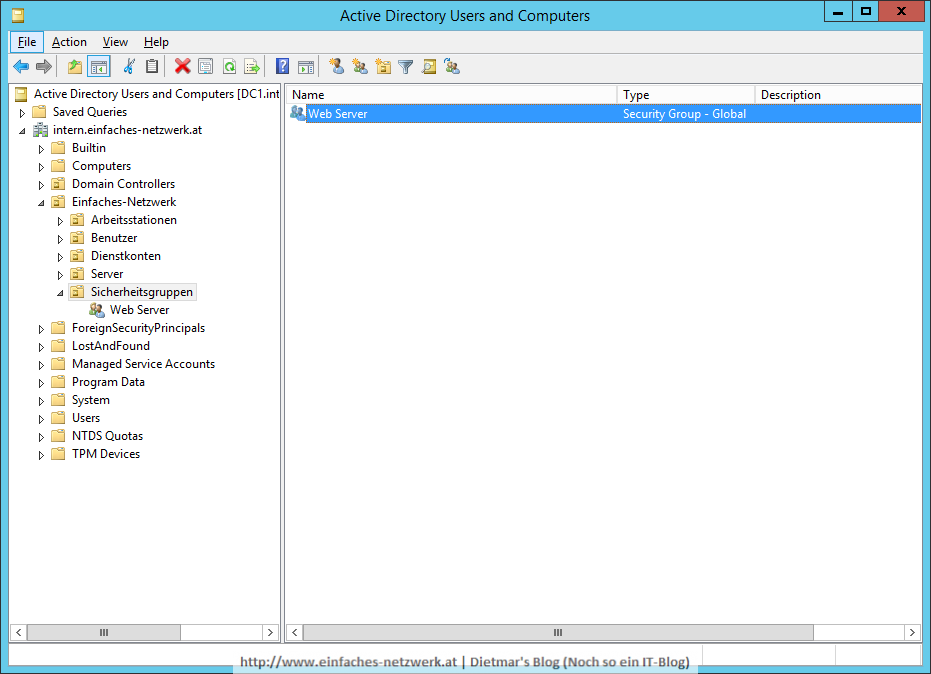
- Den Server zur Gruppe Web Server hinzufügen
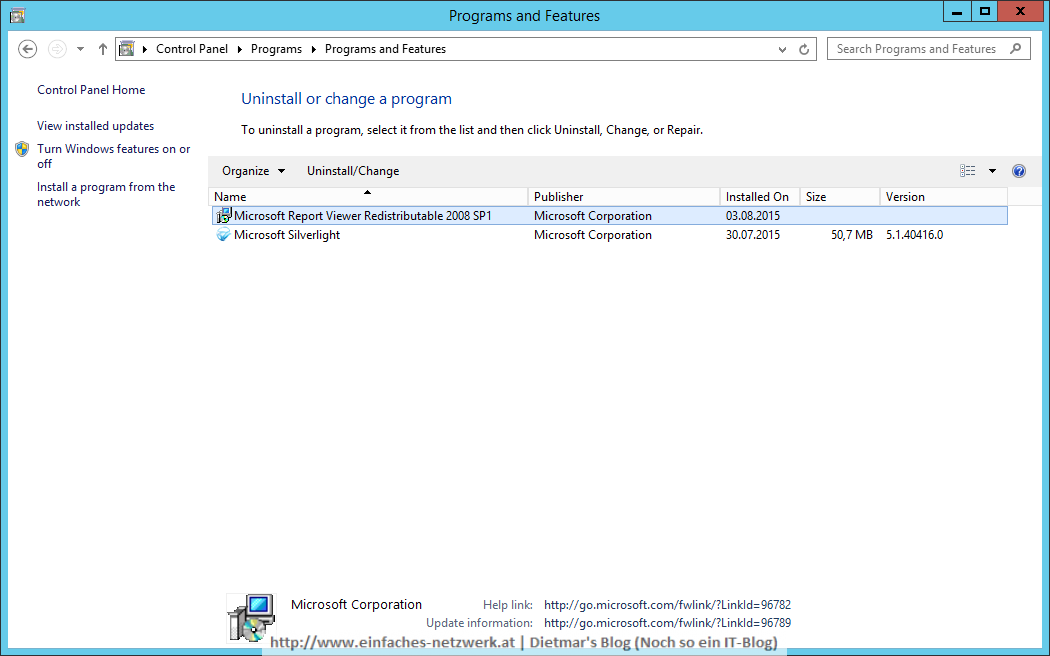
Microsoft Report Viewer 2008 installieren
- Microsoft Report Viewer 2008 SP1 Redistributable nach C:\Sourcen herunterladen
- ReportViewer.exe doppelklicken und den Bildschirmanweisungen folgen
- Alle Fenster schließen
Microsoft SQL Server 2012 SP2 Express mit Tools installieren
- Microsoft SQL Server 2012 Service Pack 2 (SP2) Express (SQLEXPRWT) nach C:\Sourcen herunterladen
- SQLEXPRWT_x64_ENU.exe doppelklicken
- SQL Server Installation Center
- New SQL Server stand-alone installation
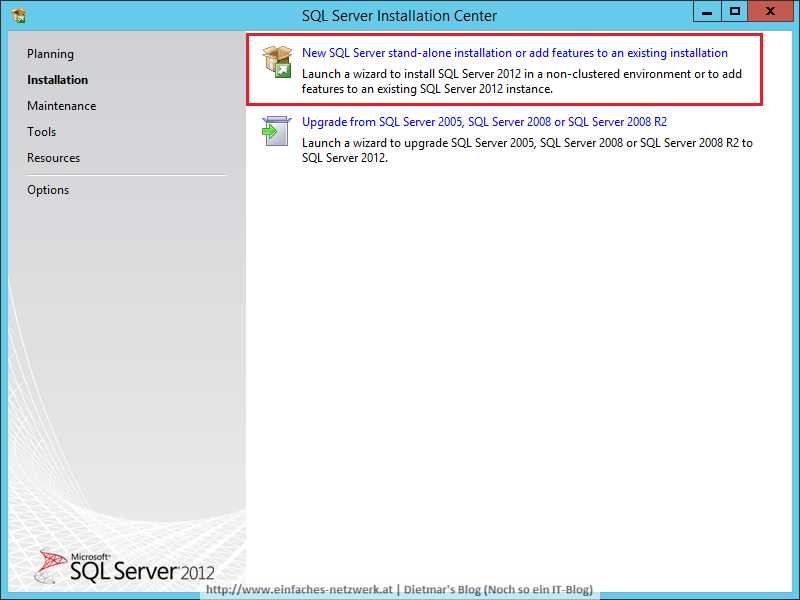
- New SQL Server stand-alone installation
- SQL Server 2012 Setup
- License Terms > I accept the license terms aktivieren > Next
- Product Updates > Next
- Install Setup Files > Install
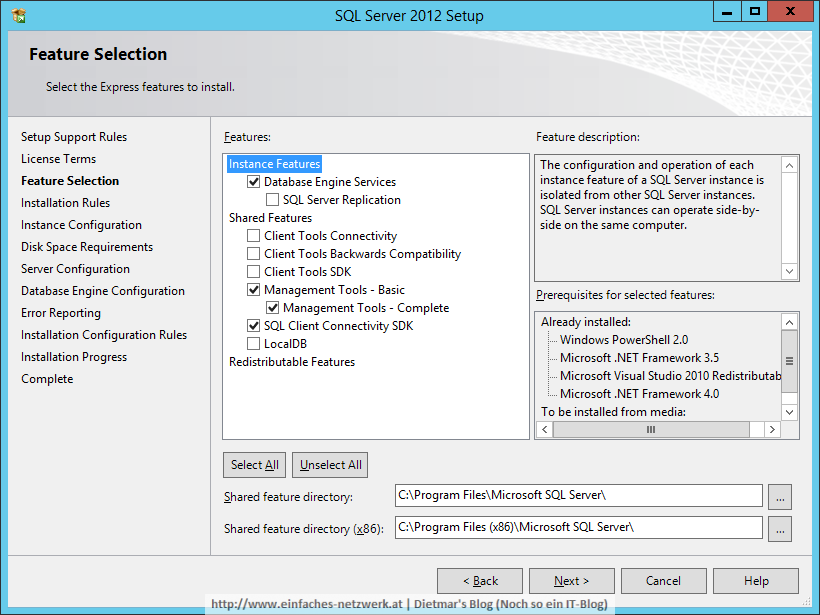
- Feature Selection
- Database Engine Services
- Management Tools – Basic
- Management Tools – Complete
- SQL Client Connectivity SDK > Next
- Installation Rules > Next
- Instance Configuration
- Instance root directory: D:\Microsoft SQL Server > Next

- Instance root directory: D:\Microsoft SQL Server > Next
- Disk Space Requirements > Next
- Server Configuration: Service Accounts
- SQL Server Browser
- Startup Type: Automatic
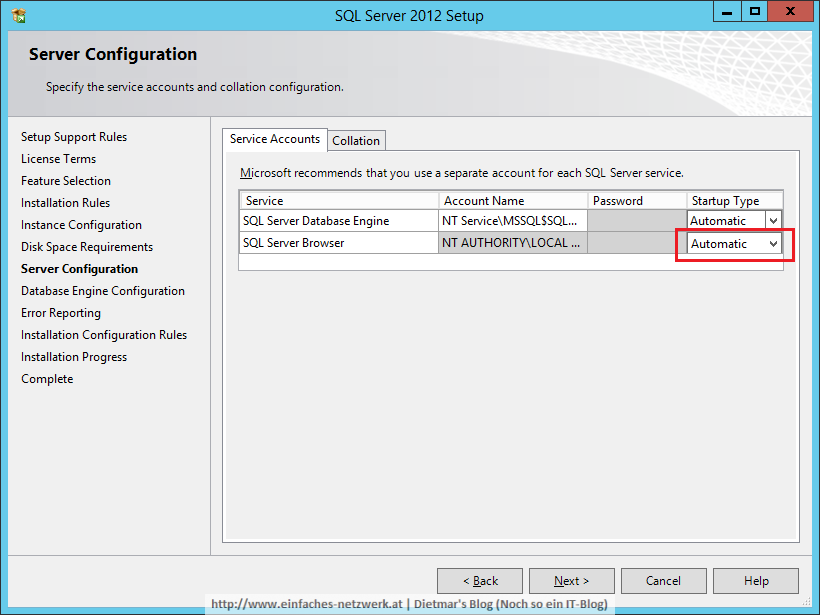
- Startup Type: Automatic
- SQL Server Browser
- Server Configuration: Collation
- SQL_Latin1_General_CP1_CI_AS > Next
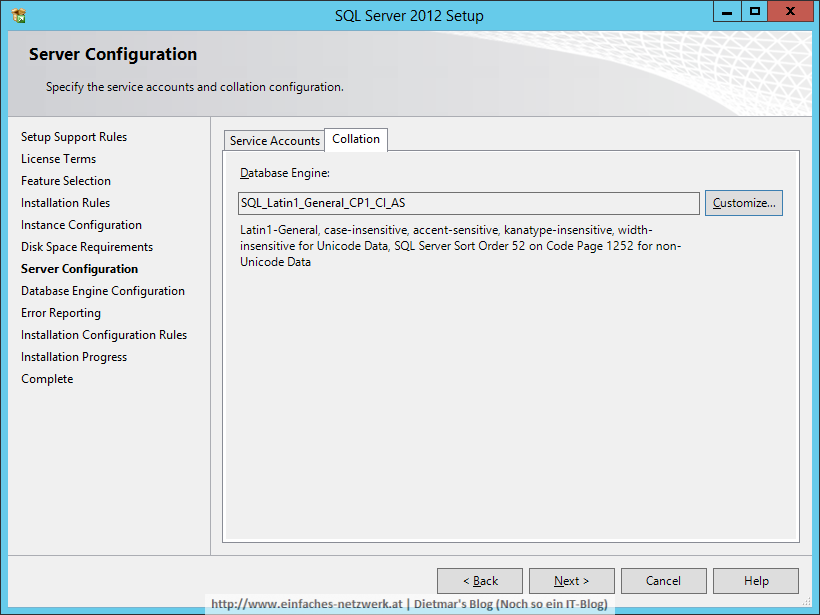
- SQL_Latin1_General_CP1_CI_AS > Next
- Database Engine Configuration
- Specify SQL Server administrators
- INTERN\Administrator
- BUILTIN\Administrators > Next
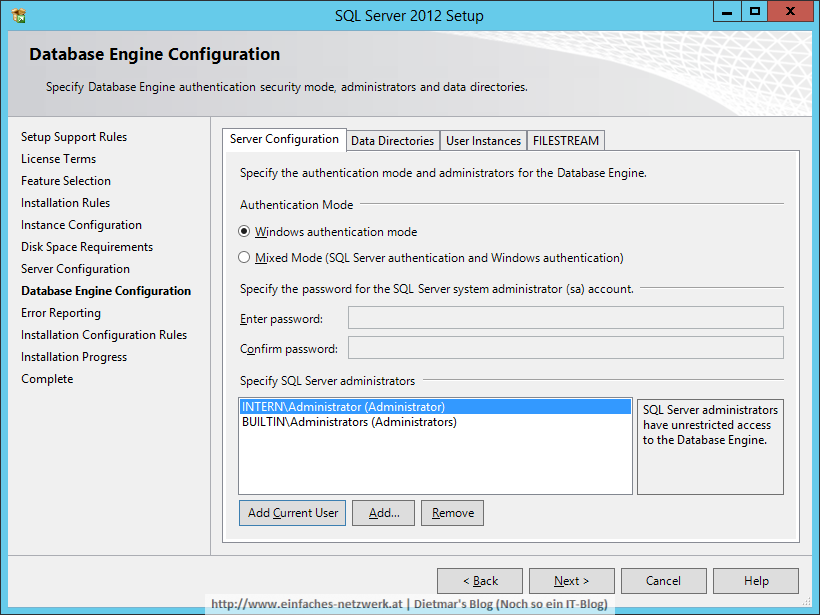
- Specify SQL Server administrators
- Error Reporting > Next
- Installation Configuration Rules > Next
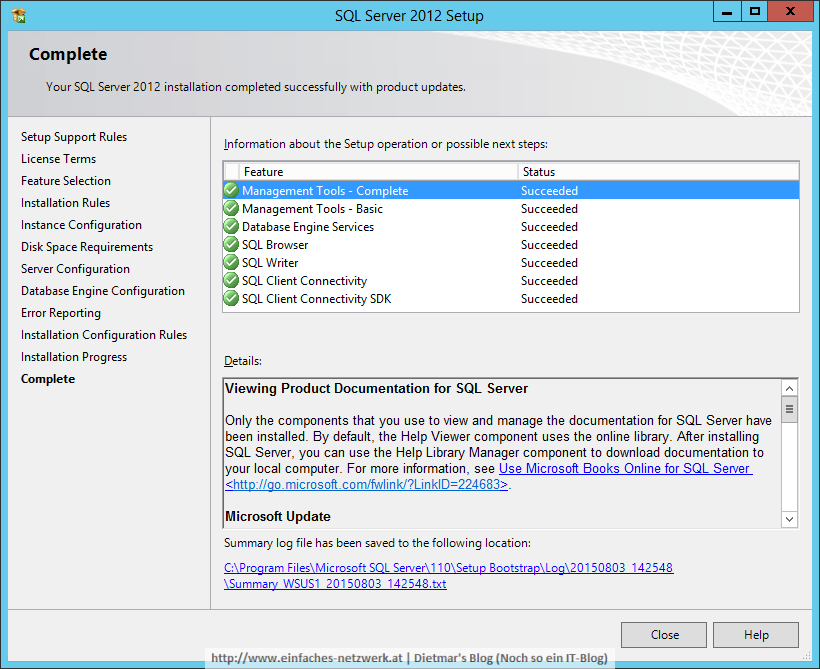
- Complete > Close
- Alle Fenster schließen
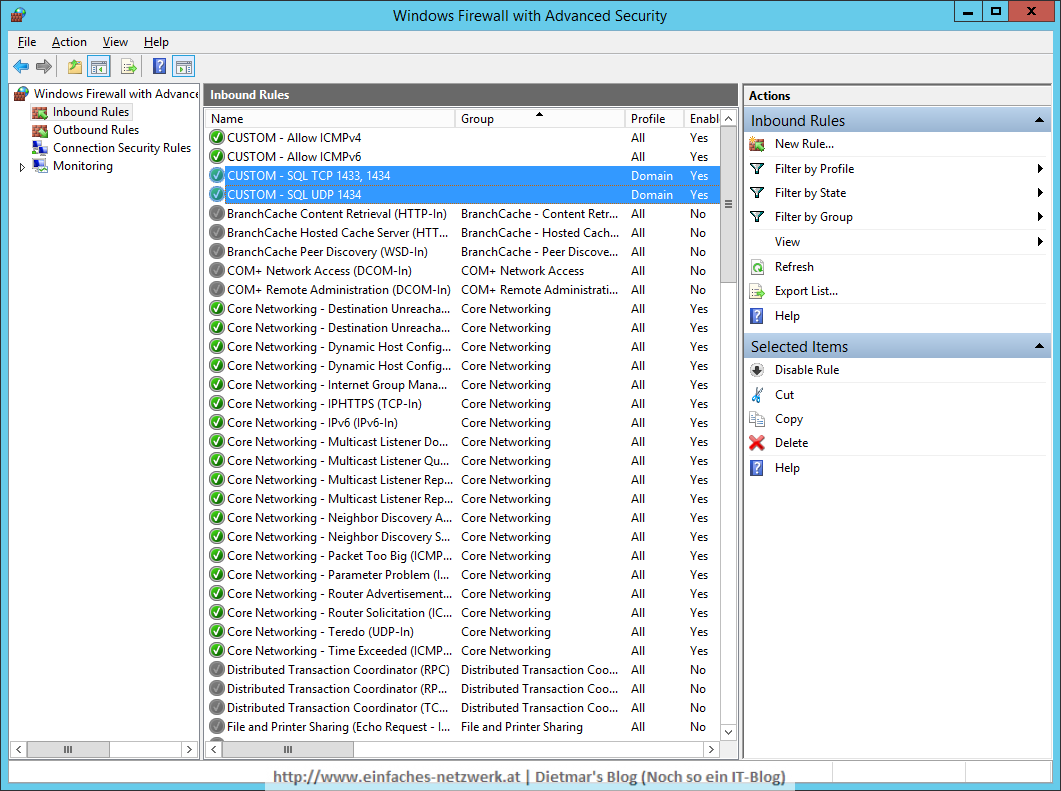
Windows-Firewall für den SQL Server-Zugriff konfigurieren
- Windows Firewall with Advanced Security (Admin) starten
- Inbound Rules rechts anklicken > New Rule…
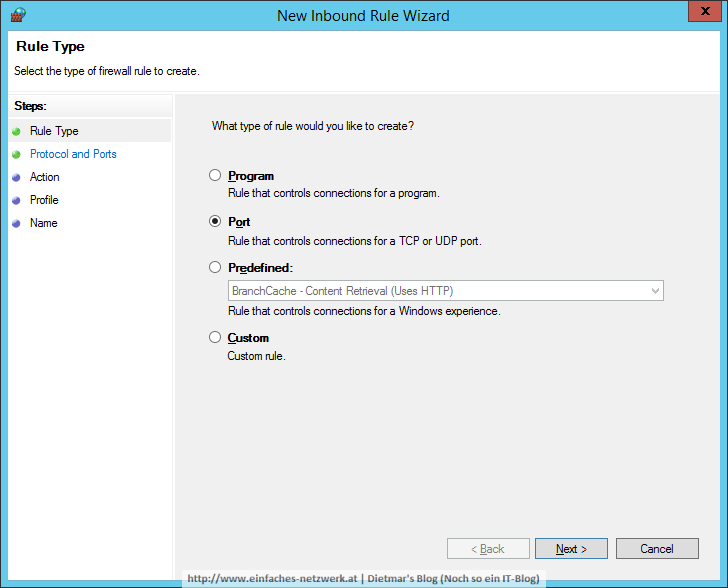
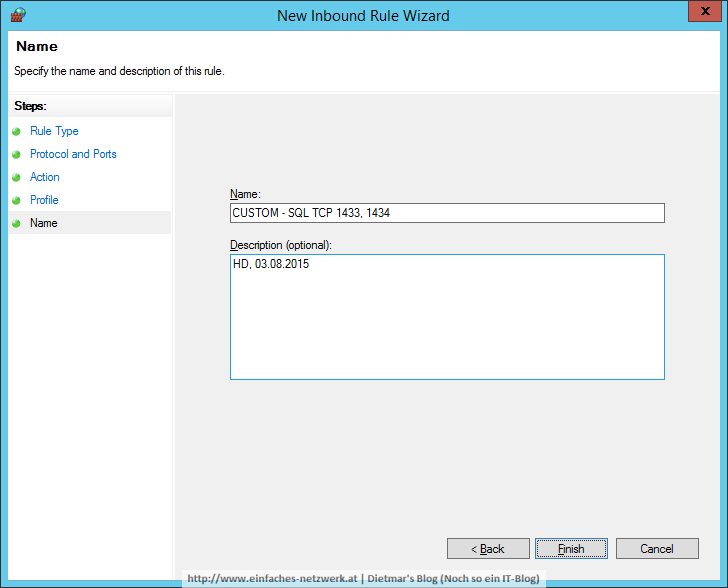
- New Inbound Rule Wizard:
- Rule Type: Port > Next
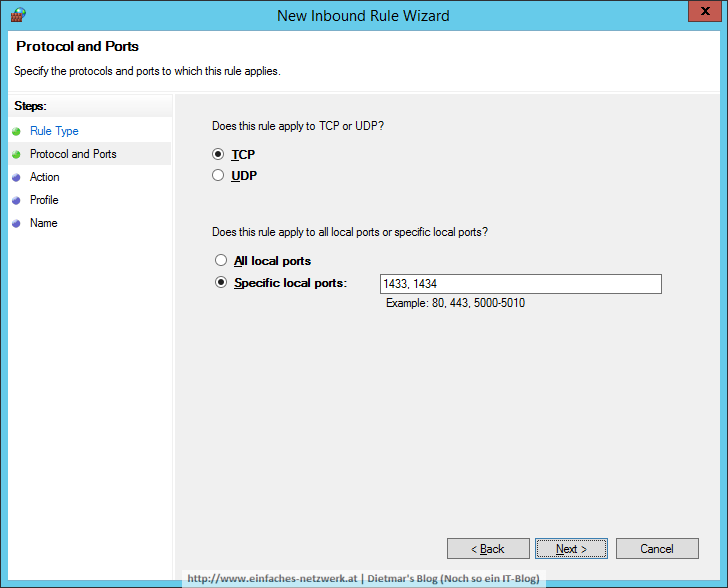
- Protocol and Ports: TCP 1433, 1434 > Next
- Action: Allow the connection > Next
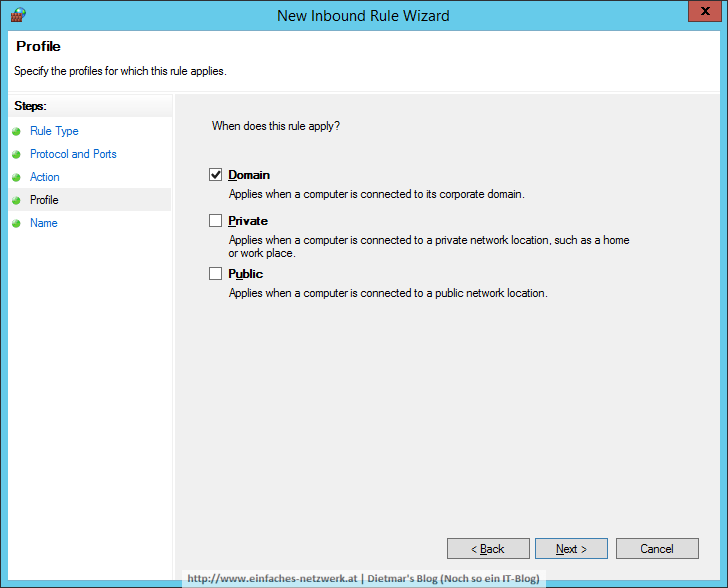
- Profile: Domain > Next
- Name
- Name: CUSTOM – SQL TCP 1433, 1434
- Description: HD, 03.08.2015 > Finish
- Rule Type: Port > Next
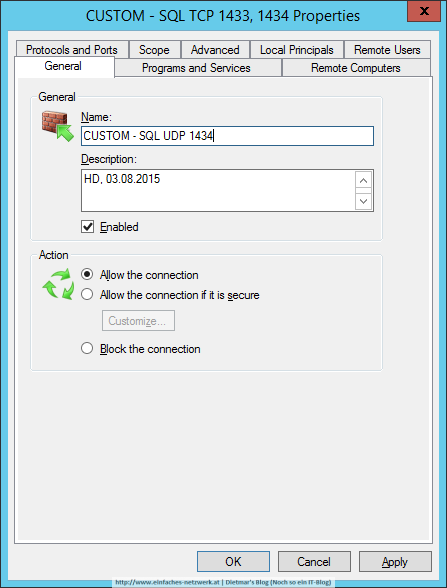
- CUSTOM – SQL TCP 1433, 1434 mit Copy and Paste kopieren und doppelklicken
- Den Namen nach CUSTOM – SQL UDP 1434 ändern
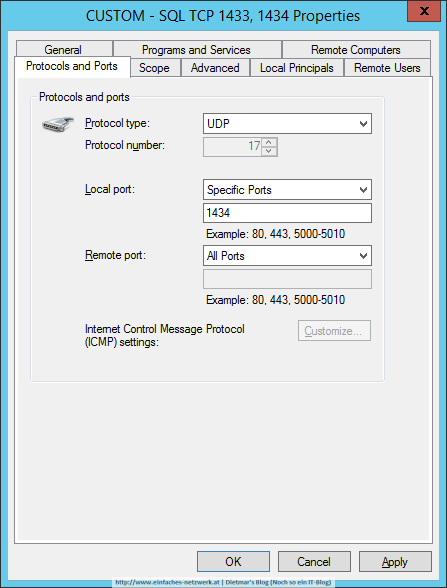
- Das Protokoll und den Port nach UDP 1434 ändern
- Fenster mit OK schließen
- Alle Fenster schließen