In diesem Teil werde ich das Windows 7-Image mit MDT verteilen. Voraussetzung dafür ist, dass in MDT OSD Prod Share wie in den Teilen 10ff vorbereitet wurde.
Inhaltsverzeichnis
- Als Administrator an MDT1 anmelden
- Deployment Workbench starten
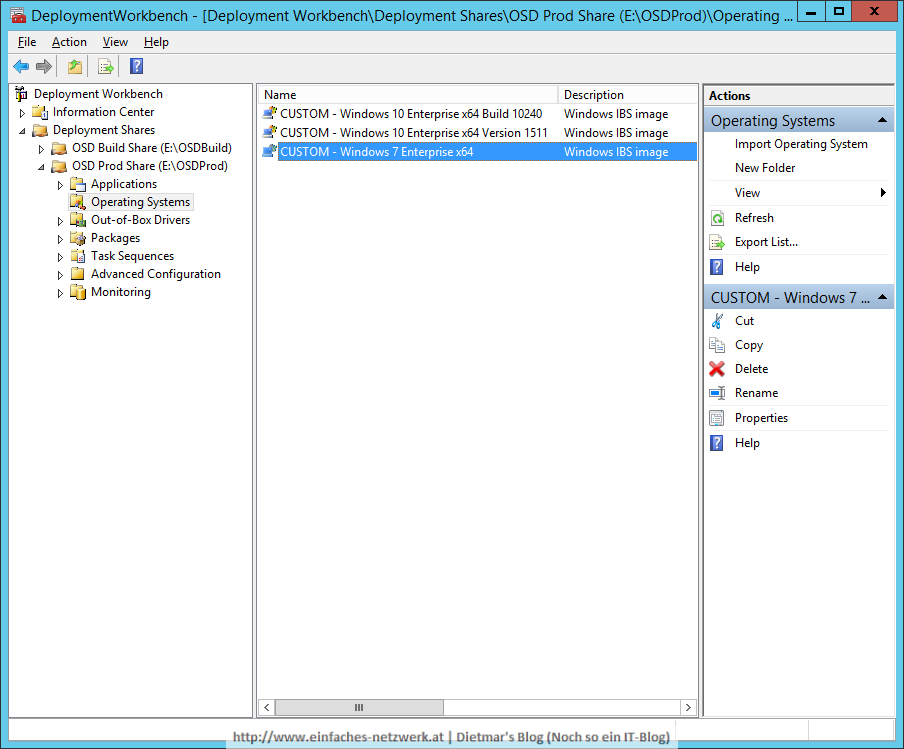
- OSD Prod Share erweitern
- Folgendes Betriebssystem zum Ordner Operating Systems hinzufügen
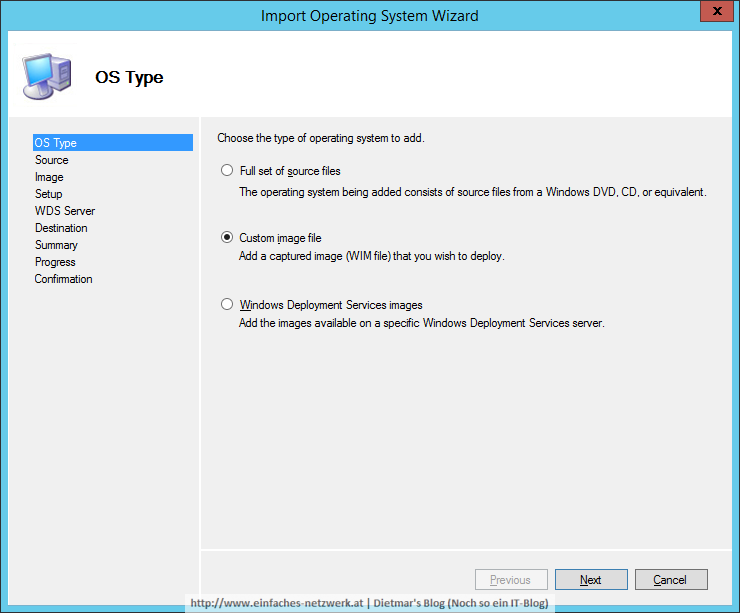
- OS Type: Custom image file > Next
- Image
- Source file: E:\OSDBuild\Captures\W7X64-001.wim > Next
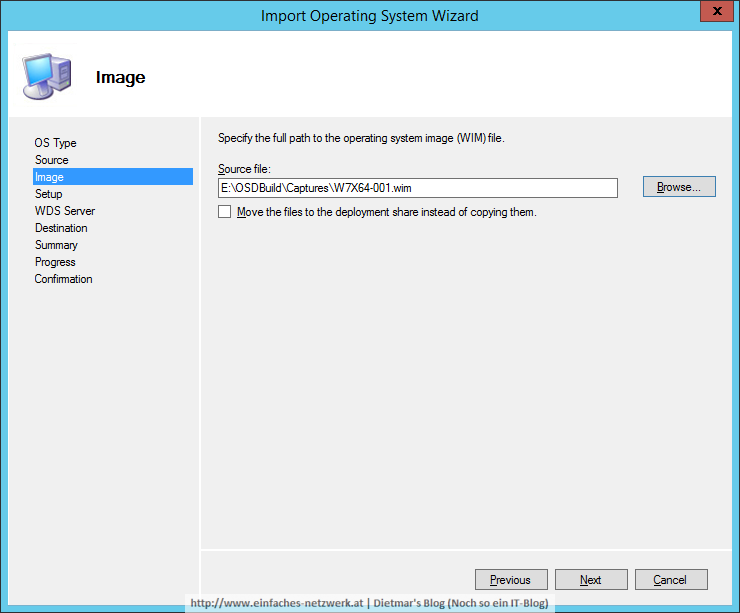
- Source file: E:\OSDBuild\Captures\W7X64-001.wim > Next
- Setup
- Copy setup files: E:\OSDBuild\Operating Systems\Windows 7 Enterprise x64 > Next
- Destination
- Destination directory name: W7X64-001 > Next
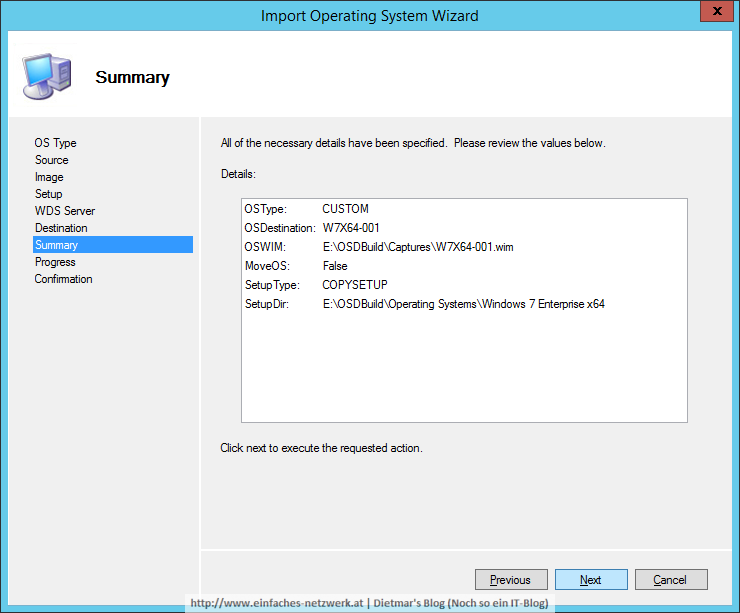
- Summary > Next
- Confirmation > Finish
- OS Type: Custom image file > Next
- Nach CUSTOM – Windows 7 Enterprise x64 umbenennen
Task Sequence erstellen und konfigurieren
- Zum Ordner Task Sequences folgende Task Sequence hinzufügen
- General Settings
- Task sequence ID: W7X64-001
- Task sequence name: Windows 7 Enterprise x64, Office 2013 Pro Plus > Next
- Select Template: Standard Client Task Sequence > Next
- Select OS: CUTSOM – Windows 7 Enterpise x64 > Next
- Specify Product Key > Next
- OS Settings
- Full name: Einfaches Netzwerk
- Organization: Einfaches Netzwerk
- Internet Explorer Home Page: about:blank > Next
- Admin Password: Password1 > Next
- General Settings
- Task Sequence zum Bearbeiten öffnen und wie folgt anpassen
- Phase State Restore
- Ordner Standard Software hinzufügen
- Folgende Schritte zum Ordner Standard Software hinzufügen
- Install Application
- INSTALL – Adobe AIR x86 x64
- INSTALL – Adobe Shockwave Player x86 x64
- INSTALL – Oracle Java RE 8 x86 x64
- Install Application
- Windows Update (Pre-Application) aktivieren
- Windows Update (Post-Application) aktivieren
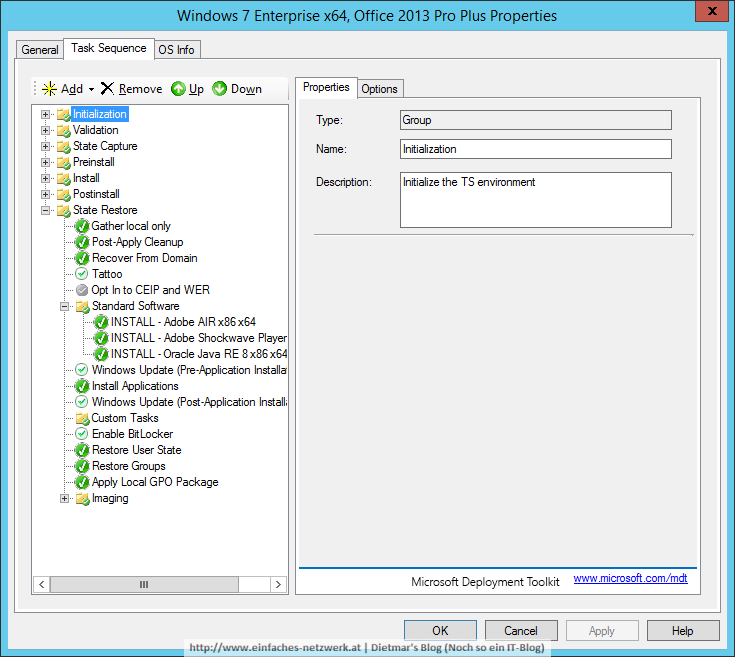
- Phase State Restore
- Fenster mit OK schließen
- CustomSettings.ini und Bootstrap.ini wie in Teil OSD Prod Share konfigurieren konfigurieren
Virtuellen Rechner erstellen – CLIENT2
- Als Administrator an HYPERV1 anmelden
- Folgenden virtuellen Rechner erstellen
- Name: CLIENT2
- Store the virtual machine in a different location aktivieren
- Generation 1
- Startup Memory: 1024 MB
- Maximum Memory: 2048 MB
- Use Dynamic Memory for this virtual machine aktivieren
- Number of virtual processors: 1
- Network Connection: CorpNet
- Hard Disk: CLIENT2.vhdx, 60GB
- Installation Options: Install an operating system from a network-based installation server
Windows 7-Image mit MDT verteilen
- CLIENT2 verbinden und vom Netzwerk starten
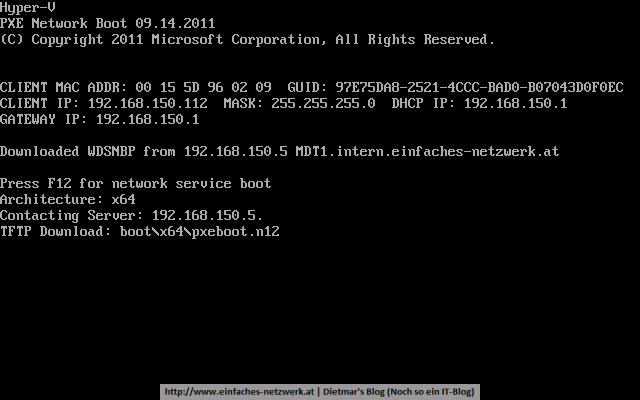
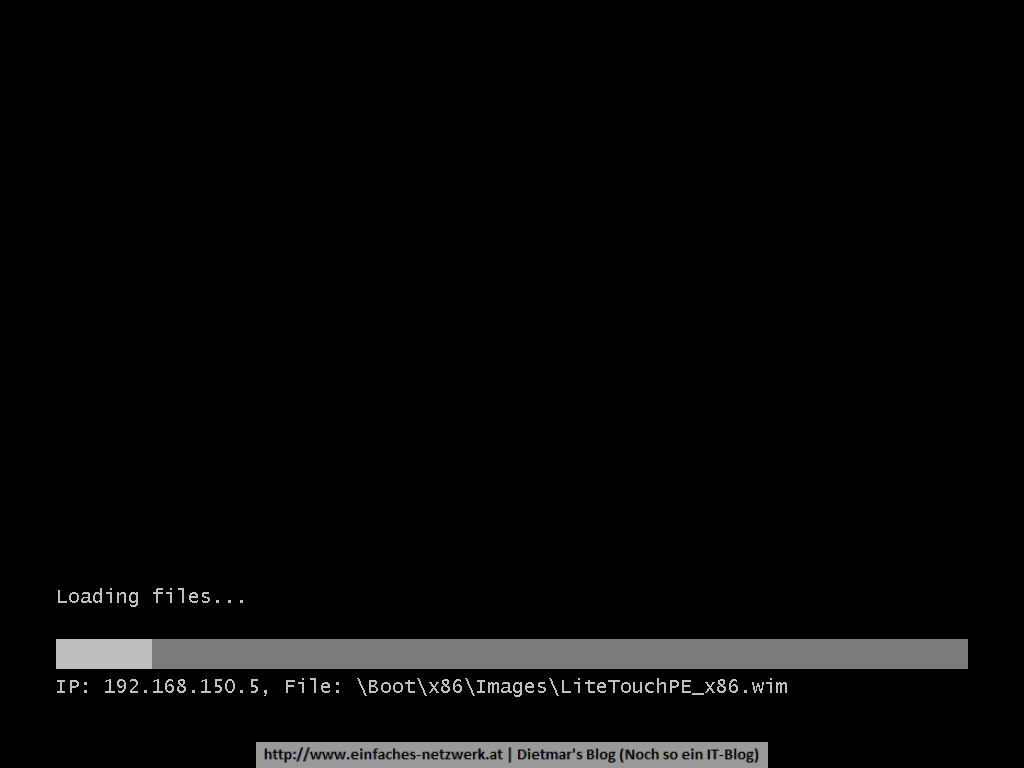
- Das Boot-Image wird geladen
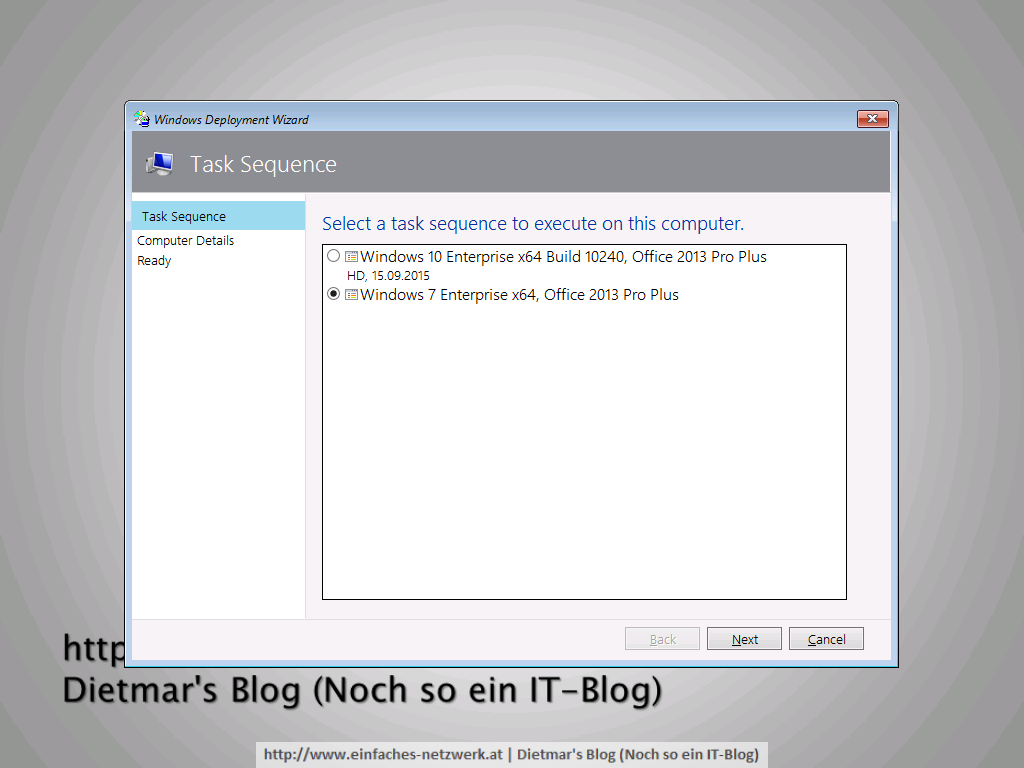
- Deployment Wizard
- Task Sequence: Windows 7 Enterprise x64, Office 2013 Pro Plus > Next
- Computer Details
- Computer name: CLIENT2

- Computer name: CLIENT2
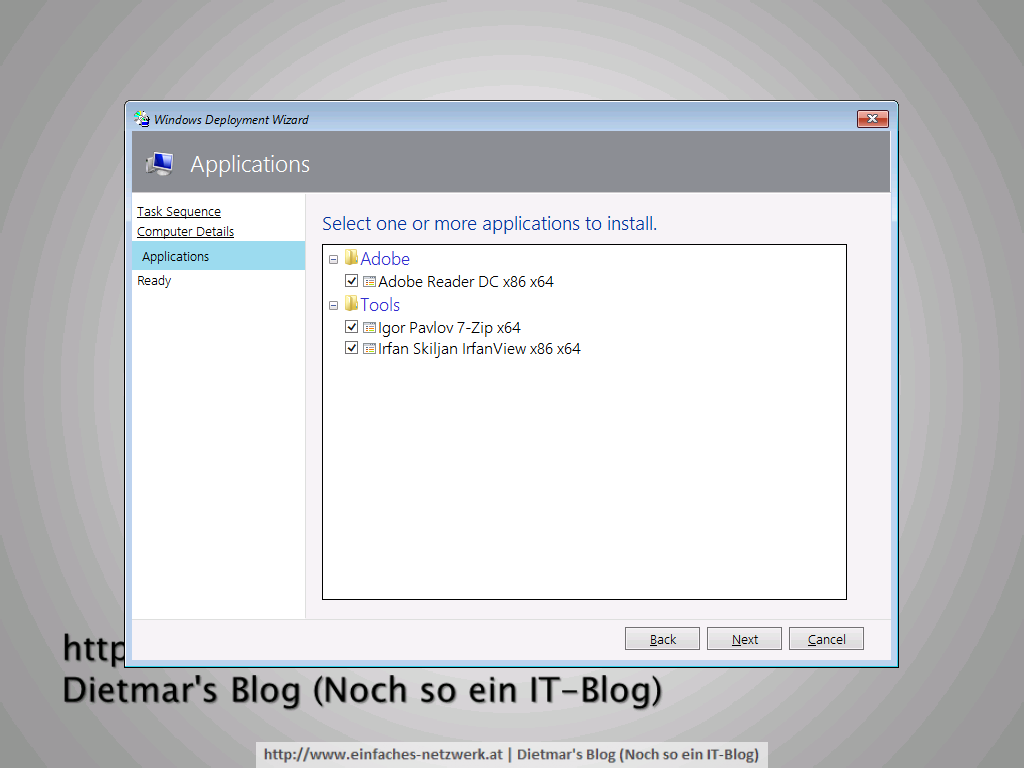
- Applications aktivieren
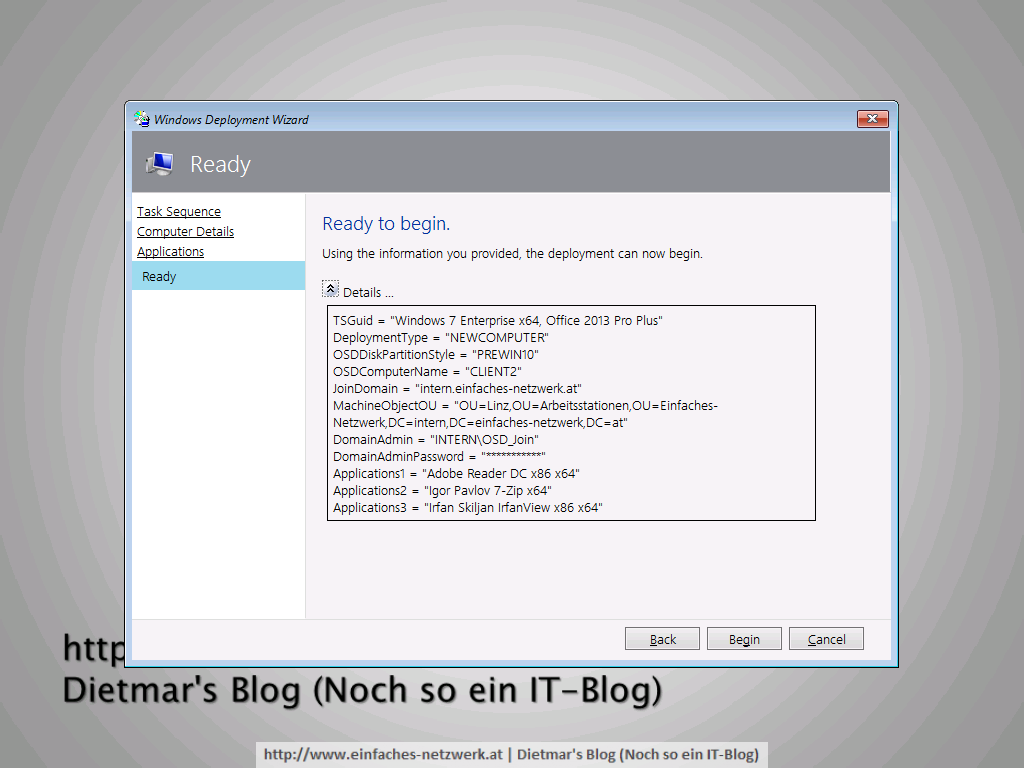
- Ready > Begin
- Task Sequence: Windows 7 Enterprise x64, Office 2013 Pro Plus > Next
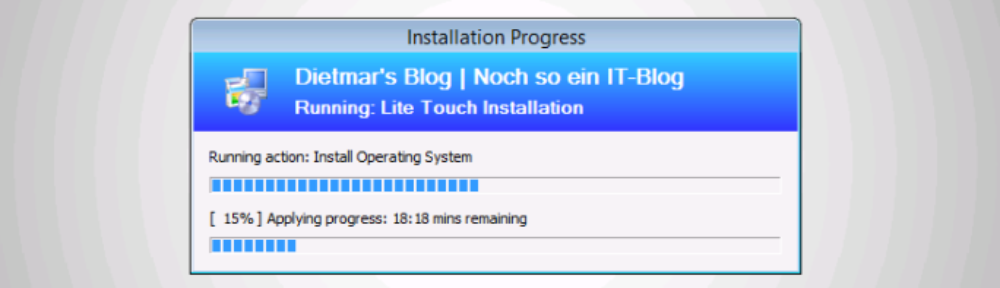
- Das Windows 7-Deployment startet
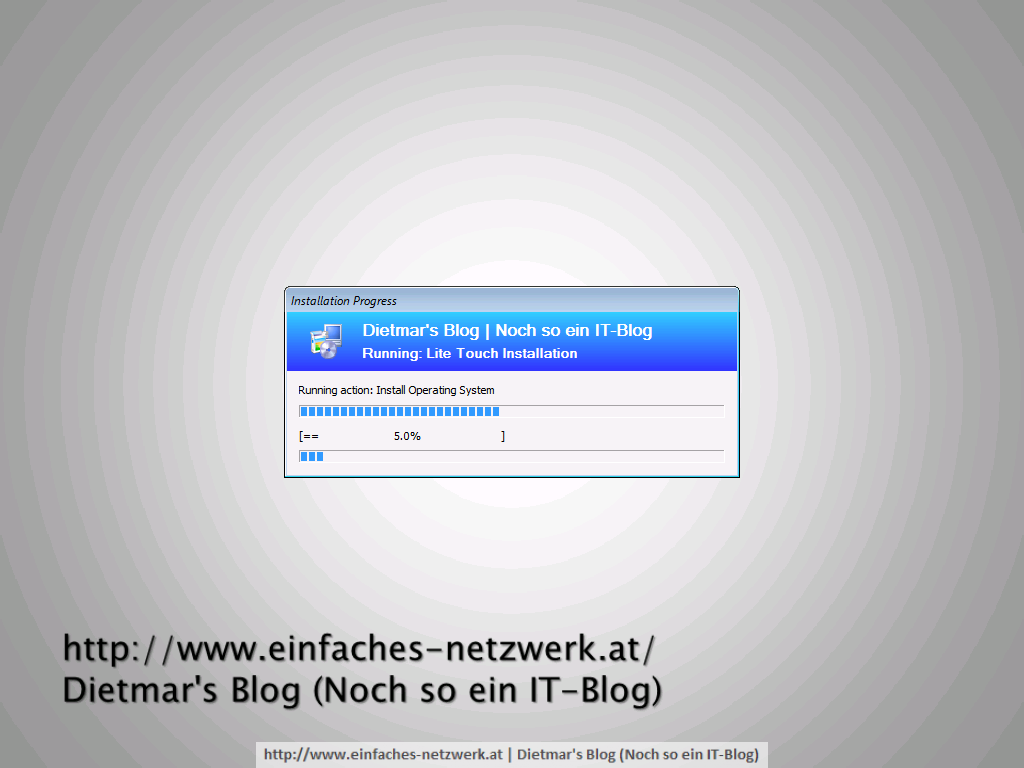
- Warten…
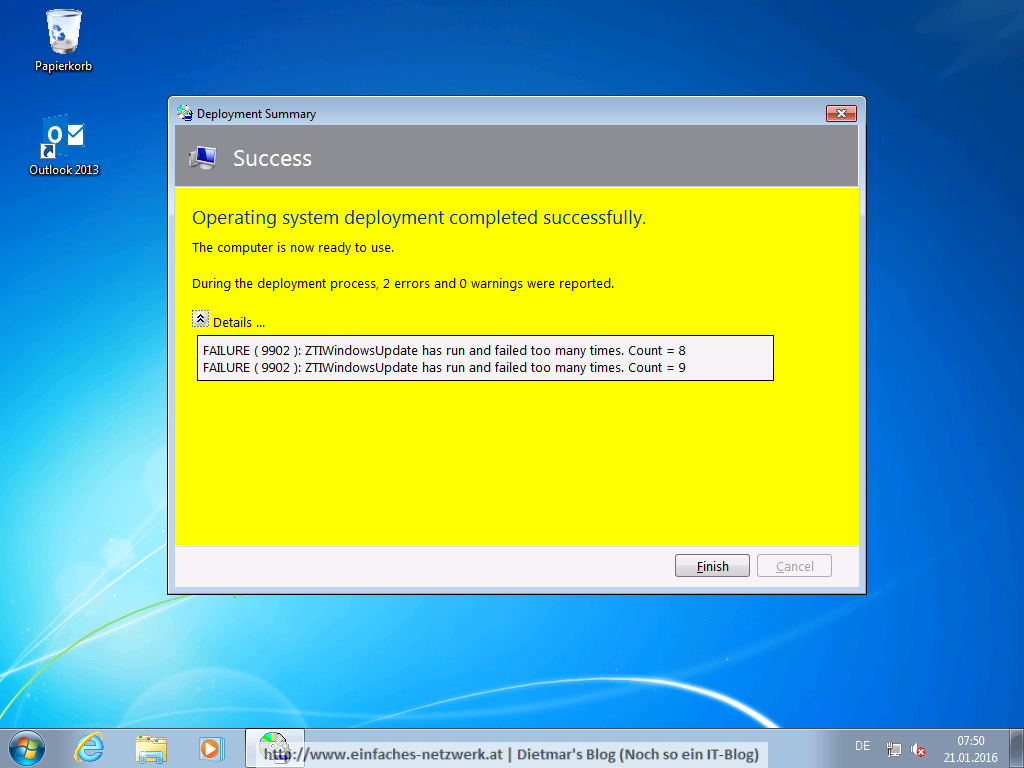
- Fertig